By Angus Burns

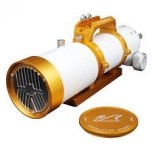
Celestron have created a range of Rowe-Ackerman Schmidt Astrographs – the 14”, 11” and the 8” (the focus of this review). The RASA 8 is the most affordable in the range and arguably the most portable too. Unlike the RASA 14 and RASA 11, Celestron states that the RASA 8 is not designed for use with a DSLR but rather a dedicated astrophotography camera or suitably compact mirrorless camera. I don’t own a mirrorless camera, so this review was limited to my experience with a dedicated astrophotography camera (in my case, a ZWO294mc Pro).
Note: The RASA 8 is not an instrument for observational astronomy – it was developed by Celestron as an astrograph that enables one to rapidly capture data using short exposure times. At F/2 this is a very fast scope, and it was my first time working with such an instrument.
I have wanted a RASA for many years and was ecstatic to be given the opportunity to review one. I have seen many amazing astro images produced from them and was excited to receive the RASA 8 from Celestron South Africa and unbox it for the first time. Did the RASA 8 live up to my expectations? Is it worth acquiring one for astrophotography? In short, I found it easy to use, superbly designed and a joy for astrophotography purposes. Read more to find out why…

RASA 8 Technical Specs
According to Celestrons website: “The 8” RASA is an imaging telescope that delivers a flat field without optical aberrations for razor sharp stars across a wide field of view. It can capture stunning deep-sky astronomical images without the challenges typically presented by longer focal length instruments at a fraction of the cost of those systems”
In summary here are some of the technical specs:
- Scope Design: Rowe-Ackerman Schmidt Astrograph
- Aperture: 8” (203mm)
- Focal Length: 400mm
- F-Ratio: F/2
- Central Obstruction Diameter: 93mm (46% of aperture diameter)
- Image Circle: 22mm
- Useable Field: 32mm
- Focuser: Ultra-Stable Focusing System
- Optical Tube Weight: 7.7kgs
- Other Features: Air cooling system, integrated filter mount
- Dovetail: CGE Dovetail
- Included Accessories: M42 Camera adapter / C-thread adapter / Fan battery pack
Unboxing
The unboxing process was straightforward with everything well-padded and packaged. This is the usual standard with Celestron – many years of experience with shipping scopes to customers across the globe has resulted in logically (and safely) packaged instruments that are easy to unpack and set up.
The box contains the following:
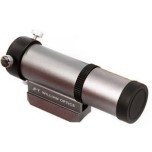
- Rowe-Ackerman Schmidt Astrograph (8”) with CGE Dovetail attached
- M42 Camera adapter / C-thread adapter / Fan battery pack
- Plastic Dust Caps
- Relevant instruction manuals
Initial experience from set-up to first imaging session
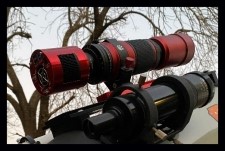
I found the RASA 8 to be user friendly and well-engineered. It was a simple process to attach my ZWO294mc Pro camera to the front of the scope and although at first it seemed strange to do this, once in place, it was an easy task to achieve pinpoint focus. I used a Starizona RASA 8 filter holder so that I could change filters with ease in between imaging sessions. A bonus is that the filter holder is designed to provide the exact back focus needed for the imaging camera making the entire set up process that much easier.
Once the scope was balanced on my mount, I switched the internal cooling fan on to ensure the internal temperature of the scope matched the external temperature. I opted to use my Celestron Power Bank to run the fan as opposed to the supplied battery pack. Within 30 mins I was ready to begin imaging.
Something I noticed is that the built-in fan on my ZWO cooled camera seemed to act as a type of dew prevention mechanism – given the size of the 8” aperture on the RASA 8, I expected it to dew up quickly given that I was imaging outdoors in Winter with a lot of moisture in the air and cool temperatures (varying between 4 degrees and -1). I was pleasantly surprised to see that no fogging-up of the scope occurred throughout the imaging sessions. I can only attribute this to the fan in the camera repelling the air that would have possibly caused a problem on the 8” corrector plate. I would however still recommend a dew shield for colder contexts.
I positioned the cabling from my camera in a spiral from the centre of the RASA 8 to the edge of the aperture to try and reduce any diffraction spikes or flaring that they might cause with stars. I didn’t notice much of an issue in my final images so I must have done the cable positioning correctly.
The field of view with my ZWO294mc Pro was wonderfully wide with well resolved stars to the edge of the field.
Achieving precise focus with the Ultra-Stable Focusing system was a breeze. I wish Celestron would fit all their higher end scopes with similar focusing systems because it is by far the best I have used yet (and I own many Celestron telescopes). Please note: you must ensure correct distancing of your astro camera to achieve correct back focus (in order for pinpoint stars) or you will find yourself struggling.
What is special about RASA optics?
Celestron state on their website that the RASA 8 provides a: “Flat field free of optical aberrations like field curvature, coma, astigmatism and chromatic aberration across an entire APS-C sensor”
They further state that the: “RASA’s optical design is patented (US 2016/0299331 A1). The design consists of a Schmidt corrector, primary mirror, lens group, and optical window. The lens group contains 4 elements and utilizes rare-earth elements. Unlike many telescopes that only perform well over the visible spectrum (400-700nm), the 8” RASA’s optics are designed to perform over a wider spectral range, from 400nm – 800nm. This allows more of the light emitted from the astronomical object to be sharply focused in the image.”
Celestron designed the RASA 8 as a super-fast imaging system that has: “a removeable optical window, so you can maintain peak optical performance if a filter is added or if a camera has its own optical window.” In addition, the optical surfaces are coated with StarBright XLT coatings, and the primary mirror has enhanced aluminium coatings which when combined ensures maximized light transmission throughout the optical system.
How does the RASA 8 perform under night skies?
I purposefully limited my astro-imaging sessions to see what the RASA 8 could achieve in a shorter time period when compared to other telescopes. As a result, the shortest session was 25mins and the longest was 3 hours. I also limited the exposure time for each sub to 30 seconds. One can of course vary this depending on the object being imaged but I decided to stay with 30 second exposures throughout my review process.
I used two filters with my ZWO294mc Pro camera (depending on the context of the session and object I was imaging) – A Baader Neodymium Moon and Skyglow Filter and a Optolong L-Extreme Dual Narrowband Filter. As stated earlier, the Starizona RASA 8 Filter Holder made changing filters during imaging sessions very easy. There are similar filter holders available from other manufacturers so it’s best to decide what your budget will allow.
I captured the following 10 images under varying atmospheric conditions and although I would have liked to image other objects, recent grassland fires around the town where I live (Newcastle South Africa) resulted in substantial haze at night that ultimately made me decide to end my review process after I had tested the RASA 8 on the objects featured here.


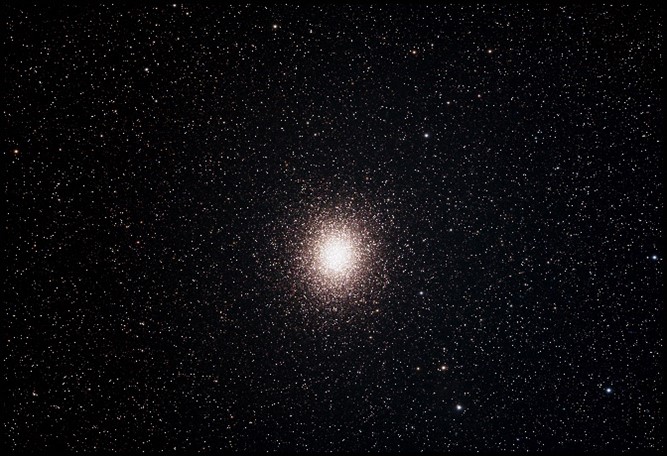
Left to right: The Southern Pinwheel (NGC 5236) and Omega Centauri Globular Cluster (NGC 5139) captured after 1 hour and 40 minutes of imaging with the RASA 8 (200 x 30 second exposures) and 25 mins of imaging (50 x 30 second exposures) respectively using a ZWO294mc pro and APT. Processed in APP / Starnet++/ LR and CC2019 (both with a Baader Neodymium filter).


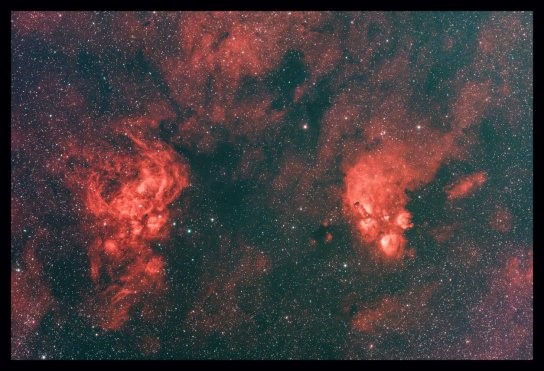
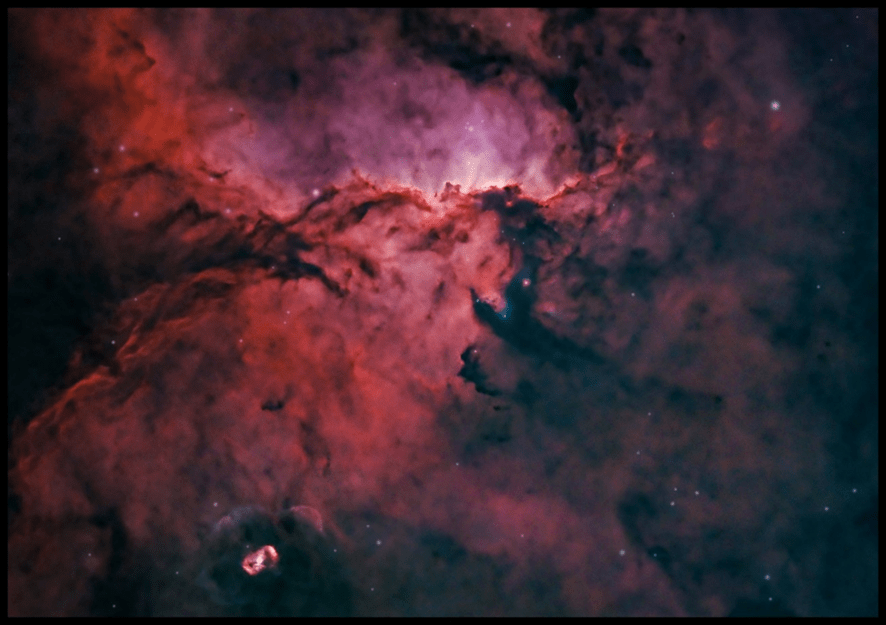
Left to right: Centaurus A (NGC 5128), Lobster Nebula (NGC 6357) and Cats Paw Nebula (NGC 6334) captured after 1 hour and 40 minutes of imaging with the RASA 8 (200 x 30 second exposures) and 1 hour of imaging (120 x 30 second exposures) respectively using a ZWO294mc pro and APT. Processed in APP / Starnet++/ LR and CC2019 (Centaurus A with a Baader Neodymium filter and the Lobster/Cats Paw with a Optolong L-Extreme filter).

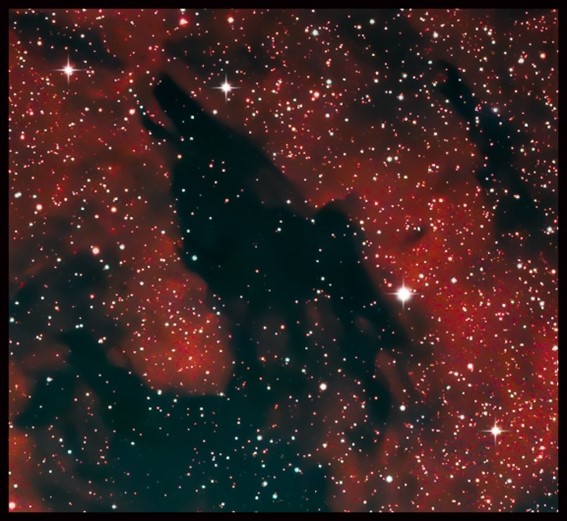
Left to right: A small section of the Rho Ophiuchi cloud complex (IC 4604) with Antares and two globular cluster visible and then a cropped image of the Dark Wolf Nebula (SL-17) captured after 30 mins of imaging with the RASA 8 (60 x 30 second exposures) and 3 hours of imaging (360 x 30 second exposures) respectively using a ZWO294mc pro and APT. Processed in APP / Starnet++/ LR and CC2019 (Rho Ophiuchi with a Baader Neodymium filter and the Dark Wolf with a Optolong L-Extreme filter).
The Verdict for Astrophotography?
Being an astrograph designed purely for imaging, I found the RASA 8 to be a remarkable piece of technology developed for those who are serious about astrophotography. It is highly portable, easy to set up and produces amazing images in a short time.
As stated at the beginning of this review, I have always wanted to own a RASA and having been given the privilege of testing and reviewing one, I can say that it truly lived up to my expectations on every level. My experience with it was sublime. The RASA 8 astrograph enables incredible opportunities for imaging deep sky objects and produces wonderful results. Stars are well resolved, nebulae crisp and clear and details beautifully preserved because of superior optics and clever engineering.
In Conclusion
In short I think I’m in love with the RASA 8! It’s an astrograph you should consider acquiring if you are a serious astrophotographer – I have no doubt it will live up to your expectations. Although I limited my imaging sessions to a max of 3 hours, I can only imagine the possibilities if many more hours are dedicated to really faint objects over many nights. With the RASA 8 the possibilities truly are endless!
Thank you to Celestron SA for the opportunity to review this amazing astrograph.